- Informatique
- Arduino
- Projets
- Mécanique
en:informatique:arduino:collectd_packet
Table of Contents
CollectdPacket
CollectdPacket is an Arduino library to create collectd UDP Packets.
On many Arduino tutorials you can see data collected by sensors and stored on flat files or posted to PHP pages… The goal of that library is to enable you to send that collected data to a centralised monitoring system.
If you Arduino board is equipped with a network adapter (wired or wireless), you will be able to
send data to a Collectd server 
This class is based on the binary protocol from collectd.
Documentation
Please find here the public methods of the class.
The concepts of 'plugin', 'instances', 'types', are directly taken from the collectd's binary protocol description.
The goal of this documentation is to facilitate the understanding/usage of the class but not to be a Collectd's reference manual.
- Class syntax and public methods
class CollectdPacket
{
    public:
        CollectdPacket( const char *hostname, unsigned long interval );
        void addPlugin( const char *plugin );
        void addPluginInstance( const char *instance );
        void addType( const char *type );
        void addTypeInstance( const char *instance );
        void addTimestamp( unsigned long timestamp );
        void addTimestampHR( unsigned long timestamp );
        void addValue( byte type, float value );

        word getPacketSize( void );
        byte *getPacketBuffer( void );
        void resetPacket( void );
}
addPlugin
Name of the plugin to affect data.
- Syntax
void addPlugin( const char *plugin );
- Example
addPlugin( "temperature" );
addPluginInstance
Name of the instance of the plugin for the case where there are several data for a single plugin (i.e several sensors)
- Syntax
void addPluginInstance( const char *instance );
- Example
addPlugin( "temperature" );
addPluginInstance( "sensor1" );
// code to get data from sensor 1
addPluginInstance( "sensor2" );
// code to get data from sensor 2
addType
Data type for plugin. This method should be used when a sensor provides various types of data.
- Syntax
void addType( const char *type );
- Example
addPlugin( "THN132N" );         // Oregon scientifics humidity and temp sensor
addType( "temperature" );
// code to get the temperature from sensor
addType( "humidity" );
// Code to get humidity from sensor
addTypeInstance
Use an 'instance' of data 'type'. This method should be used when a sensor provides various sub-types of data.
- Syntax
void addTypeInstance( const char *instance );
- Example
addPlugin( "Sensor" );
addType( "power" );      // Example sensor that measure electrical power
addTypeInstance( "watts" );
// code that get the power in watts from sensor
addTypeInstance( "amperes" );
// code that get the power in amperes from sensor
addTimestamp
Timestamp the packet. The date is in seconds since January 1st 1900.
- Syntax
void addTimestamp( unsigned long timestamp );
Since recent versions of Collectd (version 5) this method is obsolete and replaced with the 'HR' (high resolution) version.
→ Please refer to function addTimestampHR
addTimestampHR
Timestamp the packet. The date is in seconds since January 1st 1900. This date can be retrieved from an NTP server.
- Syntax
void addTimestampHR( unsigned long timestamp );
addValue
This method is the one that add the data to the packet. The method take two arguments. The data type and the data itself.
The data types are defined as constants :
- VALUE_TYPE_COUNTER
- VALUE_TYPE_GAUGE
- VALUE_TYPE_DERIVE
- VALUE_TYPE_ABSOLUTE
This types are directly taken from RRDTool supported types, as RRD is the default storage format of Collectd.
- Syntax
void addValue( byte type, float value );
- Example
addPlugin( "temperature" );
addPluginInstance( "sensor1" );
// code to get data from sensor 1
addValue( VALUE_TYPE_GAUGE, sensor1_temp );
addPluginInstance( "sensor2" );
// code to get data from sensor 2
addValue( VALUE_TYPE_GAUGE, sensor2_temp );
getPacketSize
Returns the packet size in bytes.
- Syntax
word getPacketSize( void );
getPacketBuffer
Return the packet buffer. This is the data that should be sent to the server.
- Syntax
byte *getPacketBuffer( void );
resetPacket
Reset the Collectd packet to start a new cycle. This method is useful when you use the same packet pointer on a loop. This method will empty all data fields except the one provided during the packet creation (client name and interval).
- Syntax
void resetPacket( void );
Usage example
The following example uses a Dallas 1-wire temperature sensor (DS18S20) to measure temperatures and send them to a Collectd server. The sensor is connected to the PIN 8 of and Ethernet shield equipped Arduino board.
- arduino_collectd_example.ino
#include <Ethernet.h>
#include <EthernetUdp.h>
#include <OneWire.h>
#include <SPI.h>

#include <CollectdPacket.h>
#include "ntp_client.h"      # Another personal library ;-)

// The device id of a DS18S20 is 0x10
#define DS18S20 0x10

CollectdPacket packet( "Arduino", 30 );   // Init 'CollectdPacket' class with :
                                          //   client name = Arduino
                                          //   interval    = 30s

OneWire        ds18s20( 8 );              // Init the OneWire on pin 8

static byte mac[]         = { 0x00, 0x04, 0x25 , 0x15, 0x48, 0x12 };
static byte ip[]          = { 10, 1, 1, 40 };
static byte collectd_ip[] = { 10, 1, 1, 100 };
static byte ntp_ip[]      = { 10, 1, 1, 254 };

// Init the UDP instance
EthernetUDP udp_handler;

void setup()
{
    Serial.begin( 9600 );
    Serial.println( "Initialized a packet for 'Arduino' with interval 30" );

    Ethernet.begin( mac, ip );
    udp_handler.begin( 8888 );     // Start an UDP instance listening on port 8888
}

void loop()
{
    float temperature;
    byte ds_addr[8];
    byte ds_buffer[12];
    char ds_idstr[17];   // 16 chars + \0

    // Search for the Dallas sensor until found
    while ( ! ds18s20.search( ds_addr ) )
    {
        ds18s20.reset_search();
        delay( 250 );
    }

    // Not so beautiful but just for DEBUGING purpose... 8-)
    sprintf( ds_idstr, "%02x%02x%02x%02x%02x%02x%02x%02x", ds_addr[0], ds_addr[1], ds_addr[2], ds_addr[3], ds_addr[4], ds_addr[5], ds_addr[6], ds_addr[7] );
    Serial.print( "Found sensor id : " );
    Serial.println( ds_idstr );

    if ( ds_addr[0] != DS18S20 )
    {
        Serial.println( "Found sensor is not a DS18S20, skipping" );
        return;
    }

    if ( OneWire::crc8( ds_addr, 7 ) != ds_addr[7] )
    {
        Serial.println("CRC is not valid, skipping...");
        return;
    }

    // Send a mesure command to the sensor
    ds18s20.reset();
    ds18s20.select( ds_addr );
    ds18s20.write( 0x44, 1 );

    // Wait for conversion to finish (~750ms)
    // There is no reason to wait it, but as this program is an example
    // we can proceed that way.

    delay( 800 );

    // Retrieve mesured data
    ds18s20.reset();
    ds18s20.select( ds_addr );
    ds18s20.write( 0xBE );      // Read the scratchpad
    ds18s20.read_bytes( ds_buffer, 9 );

    unsigned int raw = ( ds_buffer[1] << 8 ) | ds_buffer[0];

    raw = raw << 3;             // 9 bit resolution default
    if ( ds_buffer[7] == 0x10 )
    {
        // count remain gives full 12 bit resolution
        raw = ( raw & 0xFFF0 ) + 12 - ds_buffer[6];
    }

    temperature = (float) raw / 16.0;
    Serial.print( "Sensor temperature : " );
    Serial.println( temperature );

    Serial.println( "Resetting packet..." );
    packet.resetPacket();
    packet.addTimestampHR( GetTimeFromNTPServer( ntp_ip, 5 ) );

    packet.addPlugin( "sensors" );
    packet.addPluginInstance( "ds18s20" );  // Could be 'ds_idstr' if you want...
    packet.addType( "temperature" );
    packet.addValue( VALUE_TYPE_GAUGE, temperature );

    Serial.print( "Generated a packet of " );
    Serial.print( packet.getPacketSize() );
    Serial.println( " bytes" );

    Serial.print( "Sending packet to 10.1.1." );
    Serial.println( collectd_ip[3] );
    udp_handler.beginPacket( collectd_ip, 25826 );
    udp_handler.write( packet.getPacketBuffer(), packet.getPacketSize() );
    udp_handler.endPacket();

    delay( 29 * 1000 ); // Sleep 29 seconds  (30s - 800ms... ;))
}
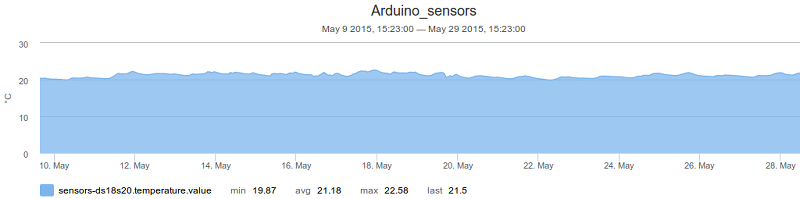
This example enables you to create nice looking graphs such as this one : 
Download
en/informatique/arduino/collectd_packet.txt · Last modified: 2022/07/01 23:17 by 127.0.0.1
Page Tools
Except where otherwise noted, content on this wiki is licensed under the following license: CC Attribution-Share Alike 4.0 International

Discussion
Thanks for your comment, i'm happy that the blog looks nice to you :)
I just used a Dokuwiki with the default theme and some CSS tweaks to fit my needs.